Sunday, February 28, 2010

Tote Bag Tutorial

This might be a good time to state that all of my patterns are for personal use only. You may make a purse for your own personal use or to give as a gift. You may not use my patterns or tutorials to make items for sale.

This tote bag is the perfect size for a gym bag, a diaper bag, a tote between work and home, a carry-on for air travel, and so much more. You can take the basic instructions and adjust the size down to a smaller bag if you use a smaller zipper. If you use a lighter weight fabric, you will need to interface your purse. 

Please let me know if anything in the tutorial is unclear or if you have questions!


Cut from home dec or outdoor weight fabrics:
2 pieces of purse fabric, 23" x 20" (for purse)
2 pieces of purse fabric, 23" x 11" (for pockets)
2 pieces of lining fabric, 23" x 20" (for purse lining)
2 pieces of lining fabric, 23" x 11" (for pocket lining)

2 lengths of webbing for the handles, 56" each piece (purchase 112" webbing)
22" heavy duty sport-weight zipper
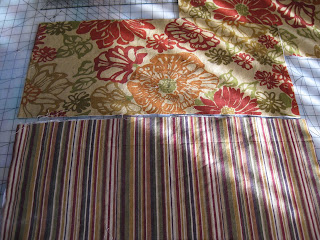


Using any kind of marking pen (it won't show), mark a 4" square in the bottom corners of the wrong side of the two purse pieces and the two purse lining pieces.


Make a zipper sandwich: purse outside piece right side up, zipper facing down, purse lining wrong side up. (see photo below) Using your zipper foot, stitch close to zipper through all layers.


Finger press these layers away from the zipper and make the same zipper sandwich on the other side of the zipper and stitch (see below). I don't recommend pressing with a hot iron near a plastic zipper.


As you sew along, you will have to pay attention to where the zipper is because zippers and needles do not mix.


You should now have something that looks like the photo below.


Sew an outer pocket piece to a lining pocket piece along the 23" sides, right sides together. Repeat with the other pocket pieces. Turn right side out. Press seams flat on right side.


Move the layers slightly off so that you end up with what you see below. Press.


Stitch two parallel topstitching lines along the faux edge trim you made by pressing the pockets off center. (see below)


On top of only one layer of the outer purse fabric, pin a pocket piece as you see below, 5 inches from the bottom of the purse. See where the striped "trim" side of the pocket is toward the top of the purse?


Pin down one of the webbing pieces on top of the pocket, tucking the ends under the pocket piece bottom. Center the webbing vertically on the purse, with 7 inches of space in the center between the webbing.


Stitch the sides and bottom of pocket to purse, making sure the edges of the webbing are tucked under the pocket piece.


Stitch close to the sides and bottom of the webbing, anchoring it to the purse, and stopping about an inch from the top (zipper) edge. Stitch at the top across the webbing a few times and back and forth across the bottom of the webbing a few times to strengthen the handle.


Follow the same process to attach the pocket to one layer of the lining fabric. Stitch sides and bottom of pocket to the lining. 


Divide the inside pocket however you would like (I made a 7-inch center pocket the same as the outside) and stitch the pocket divider sections.


Stitch the webbing to the other side of the purse fabric in the same manner, but you will not have a pocket piece on this side. Measure and space the webbing handle and stitch down to match the side that you already did (the pocket side).


Unzip the zipper. Lay out the purse and pin all around the outside, purse fabric to purse fabric and lining fabric to lining fabric, right sides of fabric together. Stitch all the way around, leaving a 6-inch opening at the bottom edge of the lining. Get as close as you can to the ends of the zipper. Clip the four corners. 


Box your corners by matching up the lines that you made when you drew the 4 inch boxes at the beginning. Stitch along the drawn lines. Trim seam.


Turn purse right side out through the opening in the lining. Turn the lower edges of the lining under and stitch opening closed, close to the edge. This closes up the opening you used to turn the purse right side out.


Push lining of purse down inside of purse itself. Hand stitch any gaps that exist where you couldn't get close enough to the zipper. If you used a separating zipper, slip stitch the bottom of the zipper closed so it can't separate.


Enjoy your new tote!


Saturday, February 27, 2010

Make a Corsage


You might be thinking: "Huh, where did this come from?"

In my past life, I was a florist. I mean in this life, but in earlier years. I enjoyed those 20-some years. My favorite part was the fact that my coworker was my mom!

Anyway, I haven't made a corsage as part of a job for over 12 years, but now and then an occasion will present itself and ask that I make up a corsage. Well, a person will ask, or suggest. In this case, I made a corsage for my lovely mother-in-law's birthday celebration.

So, I better quit with this talk of years or someone will do some math and come up with a pretty good sized number. Let's get down to business here.

Buy some pretty flowers. Smaller blossoms are nice for corsages. Leaving a 1/2 inch or so stem, cut or pinch off each flower.

Buy some size 24 gauge green florist wire. Cut lengths of about 6 inches or so, one for each of your flowers that you are using. Push a wire through the fat part of the upper stem. I'm sure it has a name, it escapes me right now and I don't feel like interrupting this to research it.


See those petals in the photo up there? Those were on the outside and were a little ragged so I plucked them off. Do the same if you need to.

Bend the wire down on both sides so they become an extension of the cut-off stem. Using florist tape, wrap the stem beginning at the top, stretching the tape as you go. It's naturally sticky this way.


Repeat until you have a nice pile of wrapped stem flowers.


Don't dismiss the flower buds; they are an adorable splash of color in your corsage. The purple stuff is statice, if you'd like to purchase some. It even dries up nicely, but that's another story.

Ok! So now make a bow with a wire stem. I am not going to include instructions for making the bow because I'm pretty sure there is a good selection of bow-making tutorials in blogland. See the pretty puffy cream colored bow in the bottom left of the photo up there? That's the size and style bow you need. Also, cut some sprigs of baby's breath, leaving their natural stems attached.

With the bow in the center, nestle some flowers up around it. And some baby's breath. Press about 3 stems together and then tape. No need to tape each flower as you add it. It can get too bulky with too much tape.


Continue adding stems, taping after every 3 stems. No need to twist the wires, they will stick on their own if you take your thumb and forefinger and press them together. 


Can you see the design taking shape? You began with the round cluster of flowers in the middle around the bow and then, as you add flowers, you are elongating the corsage shape. Don't just make one big round blob. Also! Don't overdo the baby's breath. It should accent, not overwhelm, your corsage.


Pretty, huh? I have taped in some salal leaves on the back. You can use any greenery, or none at all. Even artificial greenery works with fresh flowers. I particularly like to use artificial ivy.


Then, using a wire cutters, cut off all the stems evenly, leaving a stem for pinning the corsage on. Tape up the stem well, we don't want wires poking your lucky corsage wearer.

Spritz your corsage lightly with water, and store in a plastic bag in the refrigerator. You can make it up to 2 days ahead of time.


Most important tip --------- buy extra flowers so you have enough left over to make yourself a beautiful bouquet!


Monday, February 22, 2010

A Penchant for Bags

Making bags is so addicting. 


There is no fitting involved, so it's a very forgiving construction process. If you can measure and sew squares and rectangles together, you can make a nice bag. The color and fabric selection that is available to create a bag seems endless.  You can choose a fabric that you wouldn't necessarily wear or use to decorate your home.

Also, they are so quick to make and require such little yardage that if you get tired of your bag you can just make a new one!


I made a few this past weekend. I would have sewn more, but a cold virus weaseled its way in and sapped a bit of my energy.

The grid on my cutting board gives you an idea of the size of these bags. I used a 22" zipper for the top opening on the large one. Next in size is the lunch bag like I made here. And finally a small pouch that uses a 7" zipper. The small pouch is made with the same fabric as the bag lining.


I have enough photos to put together a tutorial for the large bag. It is the perfect size for many uses: gym tote, diaper bag, carryon flight bag. 


Tutorial to be posted soon!

Be sure to visit  Sew & Tell Fridays. I'm not the only one making bags!

Thursday, February 18, 2010

Vintage Bowls


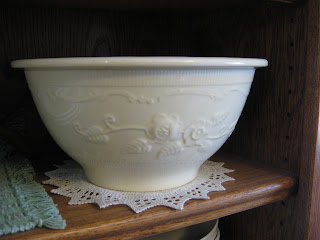
For this week's Vintage Thingies Thursday, I would like to show you my weakness: vintage bowls. I have a nice collection and actually use most of them. The one shown above is my favorite. The photo doesn't do it justice, it is actually a butter yellow color. I don't use this one, it just sits there and looks pretty.


This one holds some of my vintage utensils that belonged to my grandma. You can also see a little bit of a covered casserole dish, not vintage, but still cute.


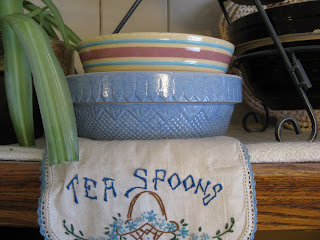
Two more, sitting on a tea spoon holder, embroidered by my grandma. To the right is a glimpse of the largest of a set of four brown vintage mixing bowls, glazed in various shades of brown. Oh yeah, and a spider plant to the left that isn't happy with dry indoor air and the lack of sunlight.


And! an update on my "new" sewing machine. I found the manual online. The manual is for the treadle model that is built the same as my electric machine. So, at least I can see the oiling points and basic instructions. 


I need the manual to figure out how to use the extra presser feet that the technician found for me. I was really excited about these since my machine did not have any accessories with it when I bought it!


The largest one in the back is a ruffler. Very intriguing and a bit intimidating.

Click on the Vintage Thingie Thursday logo to visit more fun vintage postings!


Monday, February 15, 2010

Weekends go by Quickly

Our weekend was all over the place. Saturday featured our local fire department's pancake feed. Can't beat those thin spongy pancakes.

I managed to get some projects done.  I made up some aprons from the dimensions of one that my grandma made. However, I made tucks instead of gathers at the waist. I think I like that look.


I made another hat like this one, this time for my husband. Apparently, it was the hit of the workday for him today. He had lots of positive comments from his coworkers.


On Sunday, we saw the movie Valentines Day and went to our favorite Mexican restaurant (El Jardin if you are ever in the South-Central Wisconsin area). Couldn't have imagined a more fun and romantic Valentines Day!

In progress: the bag in this photo. And I have enough pics to write a tutorial, so watch for that soon. It's a great bag -- zippered top and pockets inside and out!


Hope your weekend was a nice blend of accomplishment AND relaxation!
Related Posts Plugin for WordPress, Blogger...